
A retro game stick that shows “No Signal,” stays on a black screen, or keeps restarting can look completely dead. In many cases, however, the problem is not the game library or the emulator. It is somewhere earlier in the chain: the selected TV input, the HDMI connection, the power source, display compatibility, or the system card.
This guide follows a safe order that helps you isolate the fault without formatting the microSD card, installing random firmware, or opening the device. Because generic game sticks vary widely, always follow the voltage, connector, and recovery instructions supplied with your specific model.
Start by identifying the exact symptom
Before changing anything, power the stick on once and watch what happens. The symptom determines where you should look first:
- No light and no response: begin with the USB cable, power adapter, and power connector.
- Status light is on, but the TV says “No Signal”: check the selected input, HDMI port, extender, and display compatibility.
- A logo appears, then the screen goes black or the stick restarts: suspect unstable power, overheating, or a damaged system microSD card.
- The menu appears, but the controllers do not respond: focus on batteries, the wireless receiver, pairing, and USB accessories.
Do not repeatedly unplug the stick while it is writing to its card. If the menu is visible, use its shutdown option when one is available.
1. Select the correct HDMI input
Use the TV remote to open the Source or Input menu, then select the exact HDMI port where the game stick is connected. Labels such as HDMI 1, HDMI 2, and HDMI ARC refer to different physical sockets. A TV may not switch automatically when a small device powers on.
If you are unsure, look at the number printed beside the port. Wait several seconds after selecting it because inexpensive sticks may take longer to start than a modern console. Also make sure the television is not displaying the input for a soundbar, receiver, or another console.
2. Reseat the HDMI connection and simplify the setup
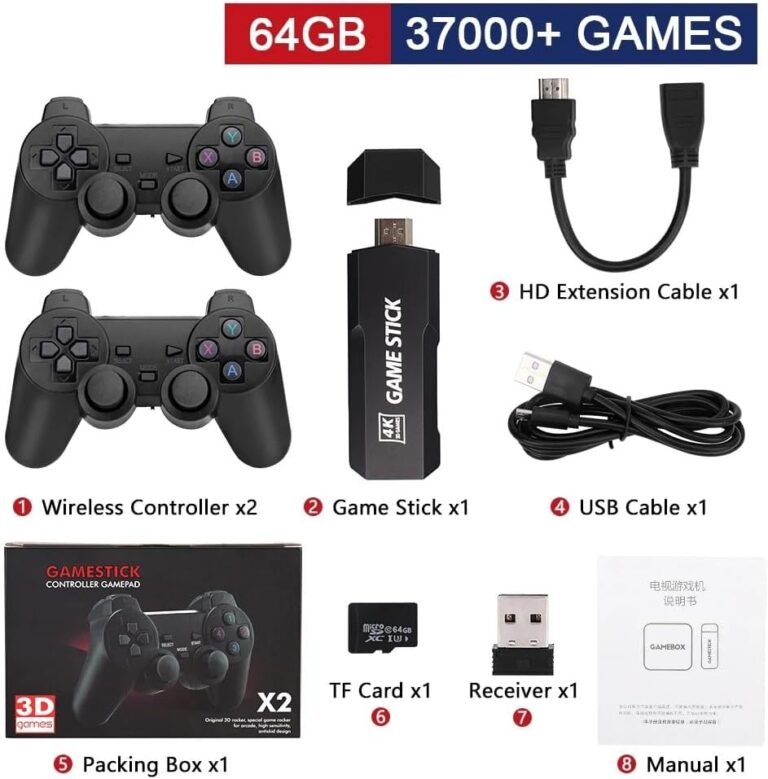
Turn off the stick, disconnect its power, and remove it from HDMI. Inspect the connector for dirt, looseness, or obvious damage, then reconnect it firmly. If the package includes a short HDMI extension cable, try it: the extender can reduce physical strain and help a bulky stick fit completely into a recessed TV port.
For diagnosis, connect the stick directly to the TV. Temporarily remove HDMI switches, capture devices, receivers, splitters, and converters. Then try a different HDMI input. Sony and Samsung both recommend checking the selected input, reconnecting the cable or device, trying another port, and testing a direct connection when diagnosing a no-picture condition.
3. Give the stick stable power
A status light does not prove that the device receives enough power to finish booting. A weak USB port or damaged cable may light an LED while voltage drops under load, causing a black screen, freezes, random restarts, or controller disconnects.
Use the supplied power adapter and cable when possible. If they are missing, check the model label or manual and use only a compatible, reputable replacement. Do not guess the required voltage. For testing, avoid unpowered USB hubs and questionable multi-port chargers. A known-good cable matters too, because thin or worn cables can introduce resistance.
Some TV USB ports are designed mainly for media playback or service functions and may not provide stable power for every stick. If the manufacturer permits a wall adapter, testing with the specified adapter is more reliable than assuming every television USB port behaves the same way.
4. Perform a clean power cycle
Shut down the game stick if possible, unplug its power, and turn off the TV. Disconnect both devices for about a minute. Reconnect the HDMI connection first, turn on the TV, select the correct input, and then restore power to the stick.
This clears temporary HDMI handshake problems and forces the television to detect the source again. Samsung and Sony include power cycling among their standard HDMI troubleshooting steps. One clean cycle is useful; repeatedly cutting power during boot is not.
5. Test another screen and a known-good HDMI device
Cross-testing tells you which side of the connection is failing. Connect the game stick to another TV or monitor that supports HDMI. Then test the original TV port with a known-working console, streaming device, or laptop.
- If the stick works on another screen, the original TV port, input settings, or format compatibility is the likely issue.
- If another device works in the original port but the stick fails on every screen, focus on the stick, its power, extender, and system card.
- If neither device works in that port, the television input may need service or a settings reset.
6. Check resolution and display compatibility
Some low-cost game sticks advertise 4K because they connect to a 4K television, even though their menus and emulators output a lower resolution. A stick can also be configured for a video mode that a particular monitor, adapter, or capture device does not accept.
If the device works on a second screen, open its display settings and select a broadly compatible mode recommended by the manual before reconnecting it to the original TV. Avoid forcing unusual refresh rates. If there is no picture on any display, do not attempt blind menu changes or use an undocumented button combination.
7. Treat the microSD card carefully
Many generic game sticks boot their operating system from a microSD card. Card corruption can cause a frozen logo, boot loop, missing menu, or black screen after the HDMI signal briefly appears. It is less likely to explain a device with no status light at all.
Disconnect power before removing the card. Do not format it when Windows or macOS says it cannot read one of the partitions; Linux-based system partitions may be unfamiliar to the computer. Before making changes, follow our guide to back up and clone a retro gaming microSD card safely. A full image backup preserves hidden partitions that a simple file copy may miss.
Only reinstall an image made for the exact hardware revision, preferably from the manufacturer or seller’s official support channel. Firmware for a visually identical stick may use a different processor, Wi-Fi chip, controller receiver, or partition layout. Random images can make recovery harder.
8. If the menu works, troubleshoot controllers separately
A working menu with unresponsive controls is not an HDMI failure. Replace or recharge controller batteries, confirm their power switches are on, and reseat the included 2.4 GHz USB receiver. If the receiver uses an extension cable, test without an unnecessary hub and keep it away from sources of wireless interference.
Follow the model’s pairing procedure rather than holding random button combinations. If supported, test one wired USB controller to separate a wireless pairing problem from a system-wide USB issue. If you need to build or expand the library, follow our guide to add games to a retro game stick safely. When the interface works but the game list is empty, use our checklist for games that are not showing up. If games appear but stop at a missing-firmware error, read the BootPixel BIOS files guide.
What not to do
- Do not format the system card before making a full backup.
- Do not flash firmware only because the product photo looks similar.
- Do not force or bend the stick in a tight HDMI socket; use a suitable extender.
- Do not connect a power supply with an unverified voltage or polarity.
- Do not open the enclosure while the device is powered.
- Do not interrupt repeated boot attempts by rapidly unplugging and reconnecting power.
Quick no-signal checklist
- Select the exact HDMI input.
- Reconnect the stick or extender firmly.
- Remove splitters, receivers, and capture devices.
- Test a known-good compatible power adapter and cable.
- Power-cycle the TV and stick once.
- Try another HDMI port and another display.
- Back up the microSD card before attempting recovery.
- Troubleshoot the controller receiver separately if the menu is visible.
When replacement or repair makes more sense
If the stick has no power with verified compatible accessories, has a damaged HDMI connector, overheats immediately, smells burnt, or fails on several displays after a careful card check, stop using it. Contact the seller while the return period is active. A replacement is often safer than experimenting with undocumented hardware.
Work through the signal path in order: input, HDMI connection, power, second display, system card, and controllers. That sequence solves common setup mistakes quickly and gives you useful evidence when the device itself is defective.